Review: Press Open or to One Side? (133)

Welcome back to Vals Quilting, today I want to talk about pressing seams open or to one side. 

I was taught to press seams to one side generally to the dark and to nest the seams when connecting blocks together, this seems to be the proper way or the way most quilters sew.

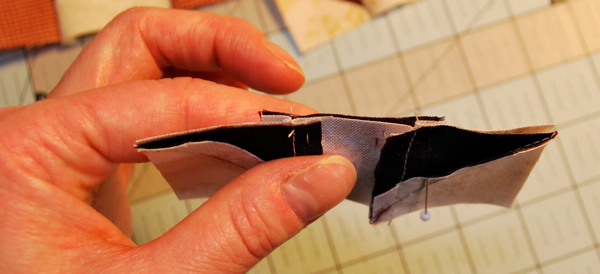
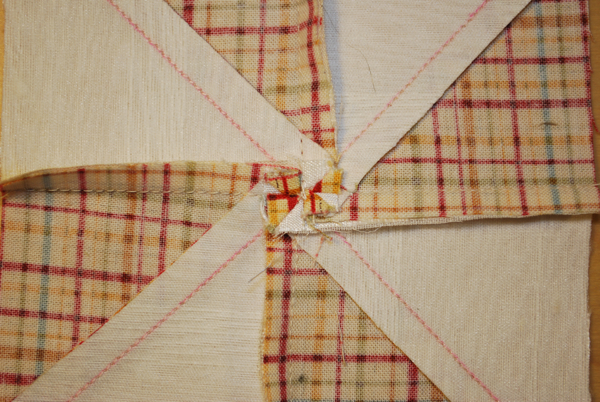
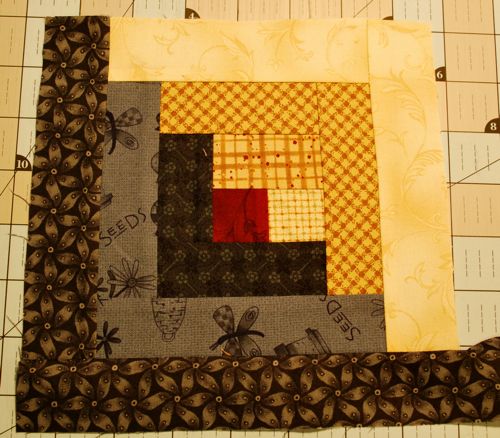
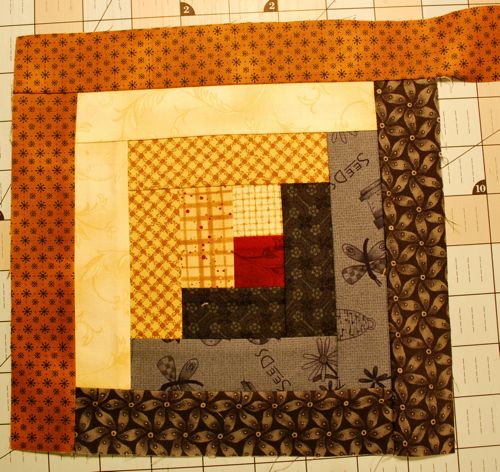
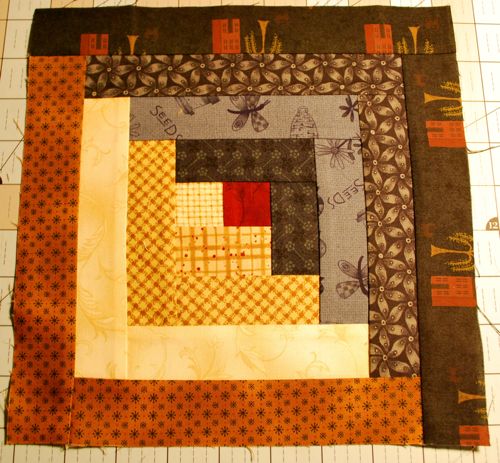
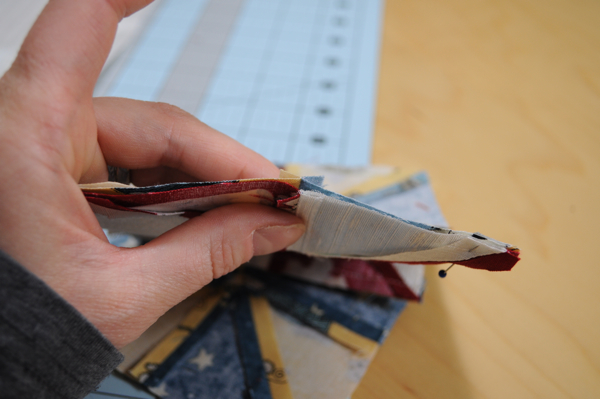
A year or so ago I was reading about quilters starting to press seams open, then I was struggling with a complicated block and my friend Beth said to press my seams open and boy did that ever make a difference. Less bulk, it lays so much flatter especially when you have multiple pieces.

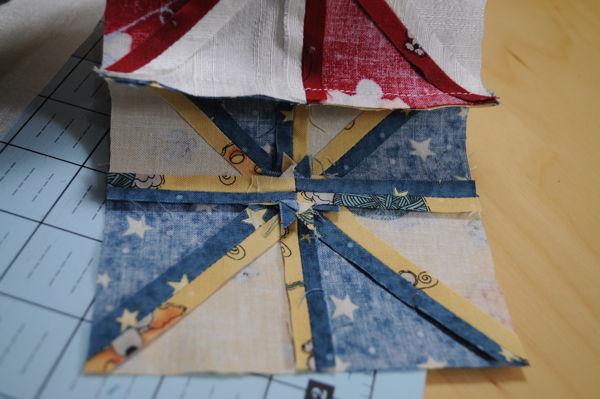
I also had the privilege recently to take a lecture or two and a workshop by Fun Quilts, Bill Kerr and they press their seams open and always have. They do this to relieve bulk. If they have no concerns about pressing their seams open and commissioning their quilts in upwards of $5000K they must be onto something….

There was some debate recently at a quilt guild meeting regarding this. One lady mentioned that pressing the seams open may make the seam vulnerable, another person agreed but if you think about it, Seamstresses and Sewers press their seams open all of the time to relieve bulk. Some sewers will finish their seams in  “french” style or zigzag over the seam allowances to ensure they are secure or even use a serger so the seam allowance doesn’t become frayed. You likely wouldn’t use a serger when quilting because this will definitely add bulk to the seam and plus you will be quilting through all 3 layers to finish the quilt and secure the blocks in place at the end.

I was taught to sew pressing the seams open, thanks Susan.

I was taught to press my seams to one side when quilting, thanks to all of you quilting experts and teachers out there 🙂

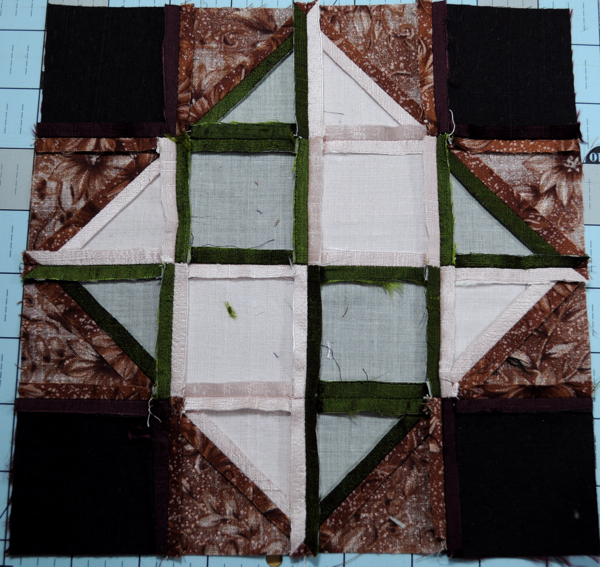
I’ve decided to press seams open and or to press in the direction that will make my block sit flat and to reduce bulk, if that means to press to one side, I will do that, if that means to press the seam open, I will do that.

Since I’ve started teaching with Chinook Learning Services, I’ve decided to teach my students to press their seams open, so far 🙂

What do you do? Press Open or to one side and Why?

Until next time, have a happy and creative day!


Quilting – Get Started, Freebie, A Kittens Tale (116)

Hi Everyone, how are you? What have you been working on lately? Last week I completed a few things including 1 hard block with about 20 inset seams, yikes it was a doozie but I LOVE the way it turned out

I finished Block 3 of A Kittens Tale bom which is so adorable…here’s the preview, I still have the yo-yos and stitching to complete

These two blocks almost took me an entire day to complete but look how amazing…well I think so anyway…they turned out 🙂

Then I got down to it and finished the sampler top for my last class in the Quilting – Get Started program on Wednesday night and I’m quite pleased, it’s so cheery and fun looking, what do you think? We will be cutting borders, layering, basting on Wednesday night, I’m kind of sad to be finished I’m so enjoying the teaching.

Check out my new Class set for the Fall Semester

Cathedral Tote

Kites for Kids, which has also been added to my Patterns Kits area here

Quilting – Get Started

I’m also working on a swap with Quilting Gallery’s website called “Be Amoungst the Bees” it’s a cute stitchery pattern I’m going to do using my silks. Are any of you doing this swap? If so, do you already have yours completed, what did you choose for fabrics?

 Also, please vote on our new Poll for 2010 block of the months clubs that are coming, we need your help!! Until next time, have a happy and creative day, 

Log Cabin Tutorial, Pizza Box Challenge (entry 18)

Hi Ya’ll, (I just like saying that as you Texan’s always sound so fun with your drawl accent)

As you know I’ve started a pizza box challenge (thanks to Boston Pizza for donation the boxes for us – so generous of them). I’m on my way to a retreat on the 2 & 3 of October so I had to get my block completed for the pizza box challenge.

I’ve always wanted a log cabin quilt but never seem to get around to making one – helping my mum right now make this beautiful one…can’t wait to see that one finished.

So I thought since I’m making one now for my Pizza Box Challenge I would do a tutorial on piecing them together the easy way.


First I found one of my favourite quilting books on blocks

Found the log cabin option pages

The block I wanted to complete (Diagram 7) and figured out my final size which will be 9″ and I wanted the one with the contrasting from one side to the other with the red block in the middle. The red center block dates back to civil war times and it generally means heart of the home. I chose 1.5″ widths for my strips.

I chose subtle blues (4)

red for the center square and tans and browns for the light side of the block


a) sew your center square 1.5″ x 1.5″ to the 1st tan as in Diagram 7

b) line up your ruler and cut the excess of this first strip off so it’s straight

c) finished center

d) add your next strip on (unfortunately I cut mine prior to taking the photo)

c) add you next 1/2 round of blues on both sides (see Diagram 7)

c) cut excess of blue off


make sure you press well on the wrong side keeping everything nice and straight

d) next 1/2 round of tans

e) remember to do both sides of the half

f) continue on until you have the desired size or equal rounds or both 😉

g) final round – press well and your done!!

any questions email me or leave a comment